Classic Client Options Menu

Revision for “Classic Client Options Menu” created on January 4, 2024 @ 06:39:11

Title
Classic Client Options Menu
Content
The Options button on your paper doll allows you to customize your client to suit your tastes and make any adjustments that may be needed for your computer. The various pages of the gump are accessed through the tabs left and right, be sure to scroll to the bottom of each page, some pages appear to have ended, but in actual fact have further choices lower down.
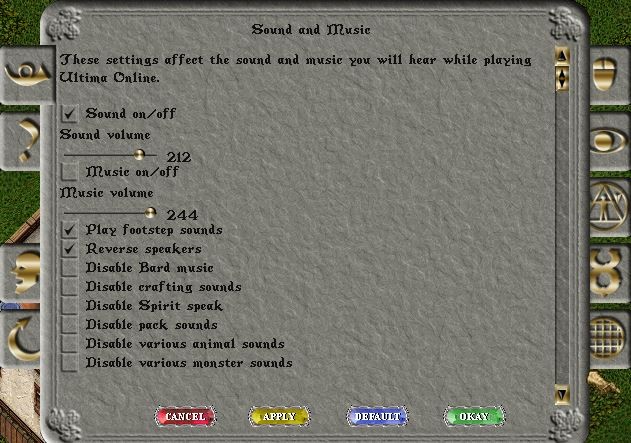
 The opening page is 'Sound and Music', top left tab, in addition to basic on/off settings you will find filters for some sounds.
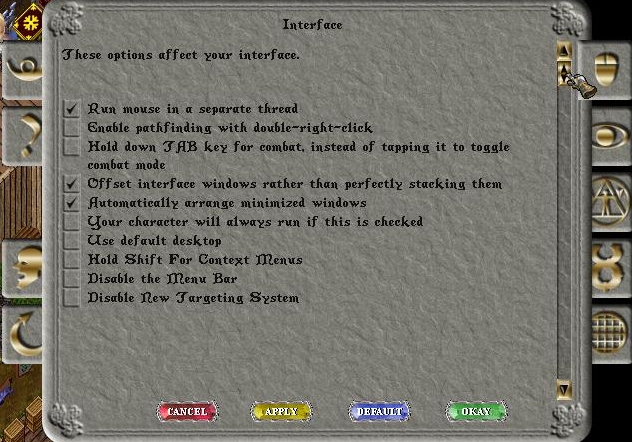
 <p style="text-align: center"><a href="https://uo.com/wp-content/uploads/2016/04/cc-options-sounds.jpg"><img class="alignnone wp-image-18373 size-medium" src="https://uo.com/wp-content/uploads/2016/04/cc-options-sounds-300x211.jpg" alt="" width="300" height="211" /></a></p> <p style="text-align: left">The first tab on the right is the "Interface" page, you will need to scroll down to see all the options on this page. This is the page on which you will find the option to remove the menubar, change your backpack view, select the different options for the<a href="http://uo.com/wiki/ultima-online-wiki/technical/classic-client-user-guide/the-classic-client-item-properties-icon/"> item properties display button</a>, or hide the button completely by unchecking the option to display it. This page can be confusing as it appears to end with the 'disable new targeting system' option but further settings will appear if you scroll down.</p> <table> <tbody> <tr> <td><a href="http://uo.com/wp-content/uploads/2016/04/options_interface.jpg"><img class="alignleft size-medium wp-image-9539" src="http://uo.com/wp-content/uploads/2016/04/options_interface-300x210.jpg" alt="options_interface" width="300" height="210" /></a></td> <td><a href="https://uo.com/wp-content/uploads/2016/04/cc-options-interface2.jpg"><img class="alignnone wp-image-18375 size-medium" src="https://uo.com/wp-content/uploads/2016/04/cc-options-interface2-300x210.jpg" alt="" width="300" height="210" /></a></td> </tr> </tbody> </table> 
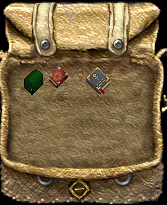
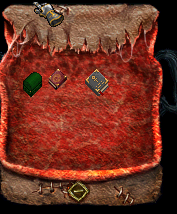
Below is an image of the three available backpack views:
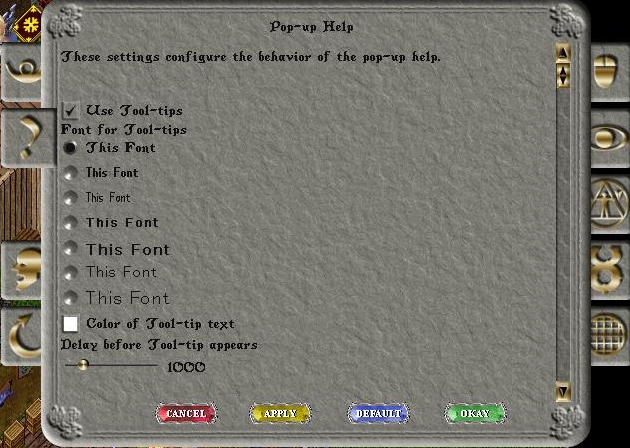
 <table> <tbody> <tr> <td><a href="https://uo.com/wp-content/uploads/2016/04/suede.png"><img class="alignleft size-full wp-image-31030" src="https://uo.com/wp-content/uploads/2016/04/suede.png" alt="" width="167" height="205" /></a><a href="https://uo.com/wp-content/uploads/2016/04/polarbear.png"><img class="alignleft size-full wp-image-31031" src="https://uo.com/wp-content/uploads/2016/04/polarbear.png" alt="" width="170" height="201" /></a><a href="https://uo.com/wp-content/uploads/2016/04/ghoulskin.png"><img class="alignleft size-full wp-image-31032" src="https://uo.com/wp-content/uploads/2016/04/ghoulskin.png" alt="" width="177" height="214" /></a></td> </tr> </tbody> </table> Second on the left is the "Popup Help" tab, this allows you to customize the various colours and fonts used in the tooltips, or to turn the tips off. <p style="text-align: center"><a href="http://uo.com/wp-content/uploads/2016/04/options_popup.jpg"><img class="size-medium wp-image-9541 alignnone" src="http://uo.com/wp-content/uploads/2016/04/options_popup-300x213.jpg" alt="options_popup" width="300" height="213" /></a></p> 
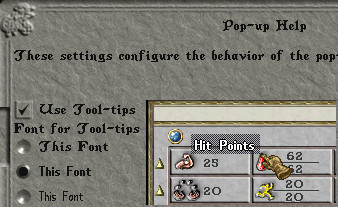
Examples of tool tips shown in two of the font choices:
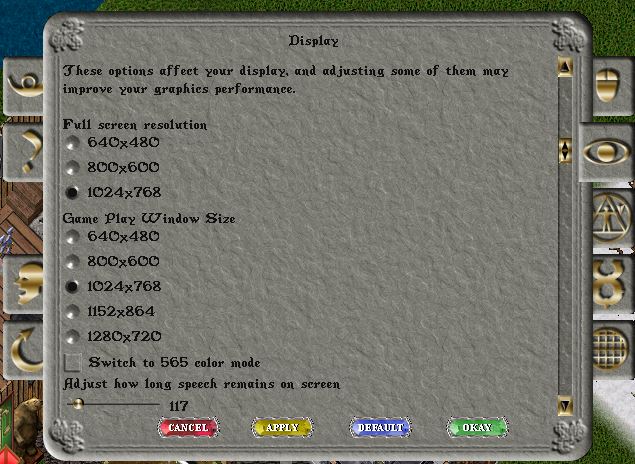
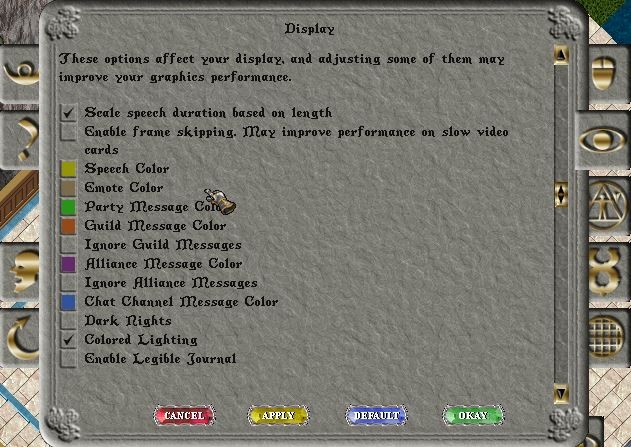
 <a href="http://uo.com/wp-content/uploads/2016/04/options-popupdefault.jpg"><img class="size-medium wp-image-9542 alignnone" src="http://uo.com/wp-content/uploads/2016/04/options-popupdefault-300x185.jpg" alt="options-popupdefault" width="300" height="185" /></a> <a href="http://uo.com/wp-content/uploads/2016/04/options-popupaltfont.jpg"><img class="alignnone size-medium wp-image-9543" src="http://uo.com/wp-content/uploads/2016/04/options-popupaltfont-300x184.jpg" alt="options-popupaltfont" width="300" height="184" /></a> Second on the right is the "Display" tab, again some scrolling is needed to see the whole page. Unless you have the technical knowledge to understand fully the options on this page, it is probably wise to leave most settings except Game Play Window Size at default values. When adjusting that you will need to take into account the display settings of your monitor.
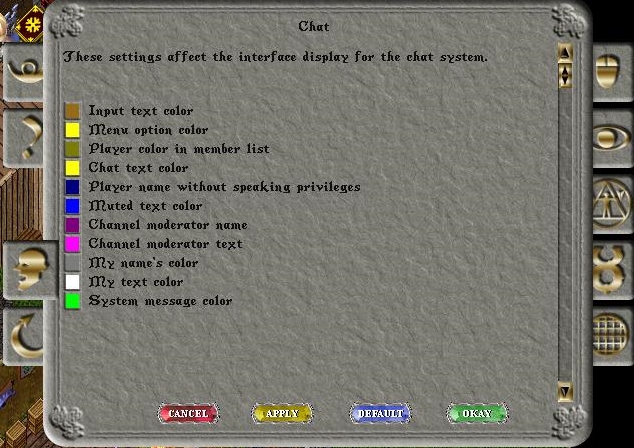
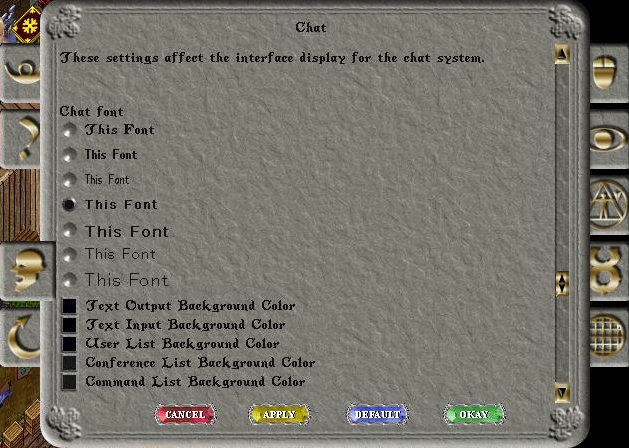
 <table> <tbody> <tr> <td><a href="http://uo.com/wp-content/uploads/2016/04/cc-display1.jpg"><img class="aligncenter wp-image-12738 size-medium" src="http://uo.com/wp-content/uploads/2016/04/cc-display1-300x213.jpg" width="300" height="213" /></a></td> <td><a href="http://uo.com/wp-content/uploads/2016/04/cc-display2.jpg"><img class="aligncenter wp-image-12739 size-medium" src="http://uo.com/wp-content/uploads/2016/04/cc-display2-300x219.jpg" width="300" height="219" /></a></td> </tr> <tr> <td colspan="2"><a href="https://uo.com/wp-content/uploads/2016/04/cc-display3-1.jpg"><img class="aligncenter wp-image-19102 size-medium" src="https://uo.com/wp-content/uploads/2016/04/cc-display3-1-300x213.jpg" alt="" width="300" height="213" /></a></td> </tr> </tbody> </table> Third on the left is the "Chat" tab, this allows you to customize the various colours and fonts used in the chat system. Scroll down to see the full range of options <table> <tbody> <tr> <td><a href="http://uo.com/wp-content/uploads/2016/04/options_chat.jpg"><img class="alignnone size-medium wp-image-9546" src="http://uo.com/wp-content/uploads/2016/04/options_chat-300x212.jpg" alt="options_chat" width="300" height="212" /></a></td> <td><a href="http://uo.com/wp-content/uploads/2016/04/options_chat2.jpg"><img class="alignnone size-medium wp-image-9547" src="http://uo.com/wp-content/uploads/2016/04/options_chat2-300x214.jpg" alt="options_chat2" width="300" height="214" /></a></td> </tr> </tbody> </table> 
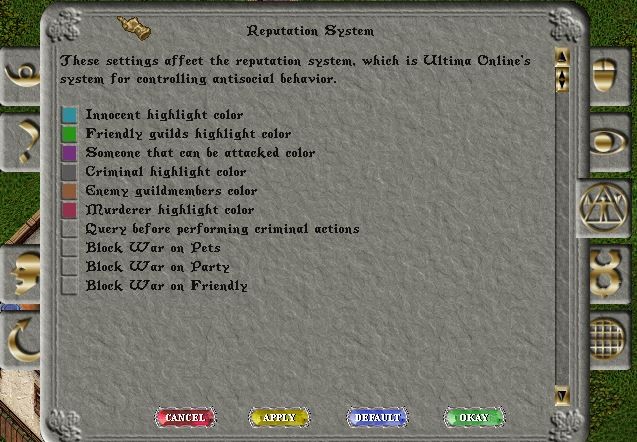
The Third, right, tab allows for customization of the various colours used to denote reputation, also the option to block war.  From publish 114, 2022 the option 'block war on pets' allows players to mount their pet while the character is in war mode. <p style="text-align: center"><a href="https://uo.com/wp-content/uploads/2016/04/cc-options-reputation.jpg"><img class="alignnone wp-image-18374 size-medium" src="https://uo.com/wp-content/uploads/2016/04/cc-options-reputation-300x208.jpg" alt="" width="300" height="208" /></a></p> <p style="text-align: left">
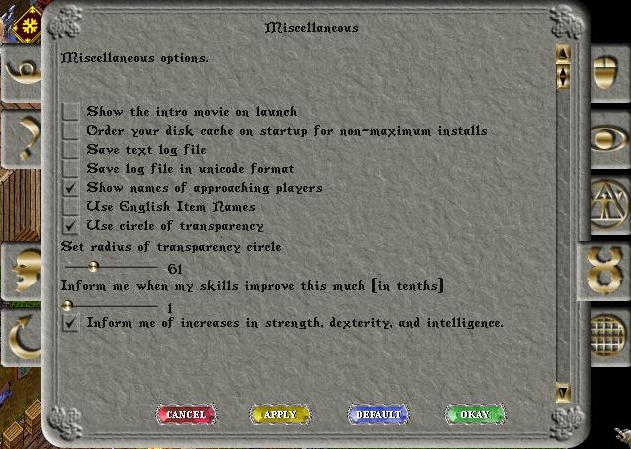
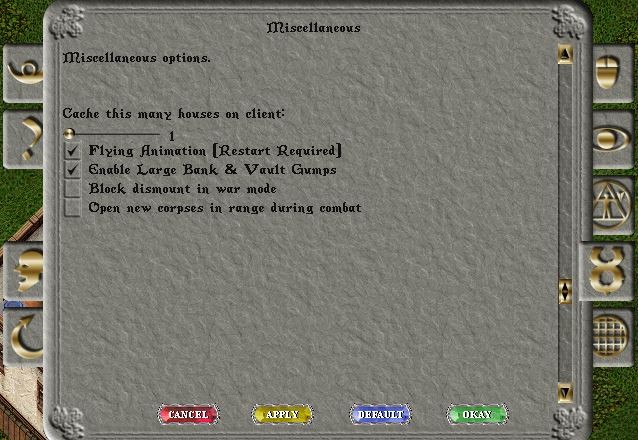
Below that is the tab which allows various miscellaneous options to be set, this is a longer page and will need to be scrolled. The second setting on this page related to a time some years ago when it was possible to play from a cd disc and not fully install the client. It is now redundant and should be ignored. As with the display settings tab, any option not fully understood should probably be left at default.
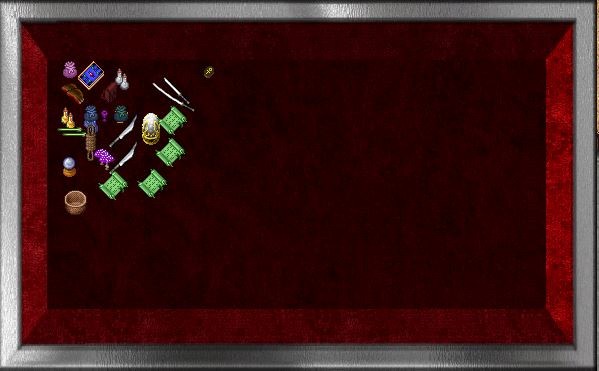
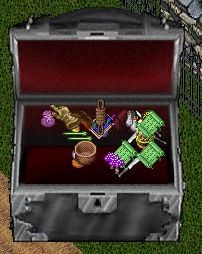
</p> <table> <tbody> <tr> <td><a href="http://uo.com/wp-content/uploads/2016/04/options_misc.jpg"><img class="alignnone size-medium wp-image-9549" src="http://uo.com/wp-content/uploads/2016/04/options_misc-300x213.jpg" alt="options_misc" width="300" height="213" /></a></td> <td><a href="https://uo.com/wp-content/uploads/2016/04/cc-options-misc2.jpg"><img class="alignnone wp-image-18376 size-medium" src="https://uo.com/wp-content/uploads/2016/04/cc-options-misc2-300x207.jpg" alt="" width="300" height="207" /></a></td> </tr> </tbody> </table> &nbsp; Below is a picture of the 'large bank' gump, together with the normal gump for comparison. <a href="https://uo.com/wp-content/uploads/2016/04/cc-bank-large.jpg"><img class="alignnone size-medium wp-image-17990" src="https://uo.com/wp-content/uploads/2016/04/cc-bank-large-300x186.jpg" alt="" width="300" height="186" /></a> <a href="https://uo.com/wp-content/uploads/2016/04/cc-bank-regular.jpg"><img class="alignnone size-full wp-image-17991" src="https://uo.com/wp-content/uploads/2016/04/cc-bank-regular.jpg" alt="" width="202" height="254" /></a> 
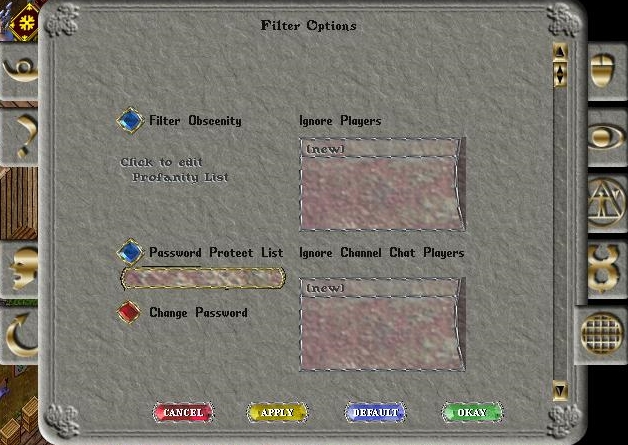
The final tab on the right allows you to filter out text from players, either in the game window or in chat. <p style="text-align: center"><a href="http://uo.com/wp-content/uploads/2016/04/options_filter.jpg"><img class="alignnone size-medium wp-image-9551" src="http://uo.com/wp-content/uploads/2016/04/options_filter-300x213.jpg" alt="options_filter" width="300" height="213" /></a></p> <p style="text-align: left">The final tab, on the left, is the "Macros" page, probably the most frequently accessed page of all. A considerable number of macros may be set and tied to 'hot keys'. You may set up to 5 lines to each macro, though it is often wise to make each alternate line a 'delay' or 'wait for target' command to ensure smooth application of your chosen action. There are a few pre-set default macros, these can be examined as examples to help understand how to make further macros customised for your personal play.</p> <p style="text-align: center"><a href="http://uo.com/wp-content/uploads/2016/04/options_macros.jpg"><img class="alignnone size-medium wp-image-9552" src="http://uo.com/wp-content/uploads/2016/04/options_macros-300x212.jpg" alt="options_macros" width="300" height="212" /></a></p> <p style="text-align: left">
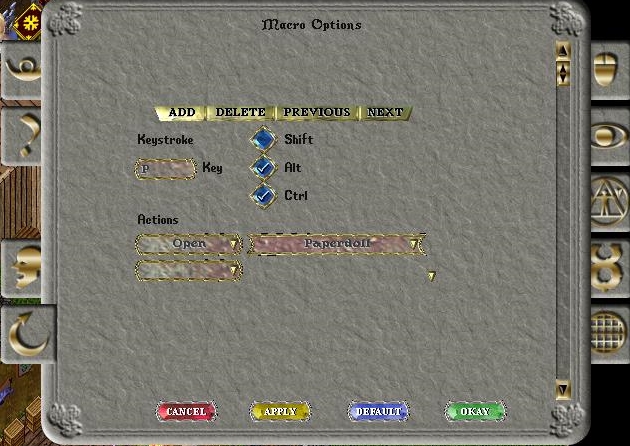
The Actions box on the right drops down to give a large variety of commands, some of which give context-sensitive drop downs on the right hand side and some which allow text or other values to be set. As an example here is the drop down menu for the 'open' command.</p> <p style="text-align: center"><a href="http://uo.com/wp-content/uploads/2016/04/options_macros2.jpg"><img class="alignnone size-medium wp-image-9553" src="http://uo.com/wp-content/uploads/2016/04/options_macros2-248x300.jpg" alt="options_macros2" width="248" height="300" /></a></p> <p style="text-align: left">
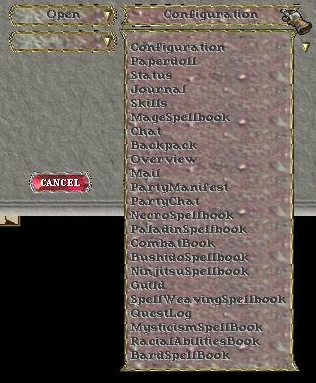
The drop down on the left of the gump gives the following list:</p> &nbsp; <table border="1" width="100%"> <tbody> <tr> <td> <p style="text-align: left">Say Emote Whisper Yell Walk War/peace Paste Open Close Minimise Maximise Opendoor Use skill</p> </td> <td>last Skill Cast Spell Last Spell Last Object Bow Salute QuitGame Allnames LastTarget TargetSelf Arm/Disarm WaitForTarget TargetNext</td> <td>AttackLast Delay CircleTrans CloseGumps AlwaysRun SaveDesktop KillGumpOpen PrimaryAbility SecondaryAbility EquipLastWeapon SetUpdateRange ModifyUpdateRange IncreaseUpdateRange DecreaseUpdateRange</td> <td>MaximumUpdateRange MinimumUpdateRange DefaultUpdateRange UpdateRangeInfo EnableRangeColor DisableRangeColor ToggleRangeColor InvokeVirtue SelectNext SelectPrevious SelectNearest AttackSelectedTarget UseSelectedTarget</td> <td>CurrentTarget TargetSystemOn/Off ToggleBuffIconWindow BandageSelf BandageTarget ToggleGargoyleFlying RecordDress Dress Undress RecordArm Disarm Arm UseObject [NONE]</td> </tr> </tbody> </table>
Excerpt


OldNewDate CreatedAuthorActions
January 4, 2024 @ 06:39:11 Mariah
January 4, 2024 @ 06:38:59 [Autosave] Mariah
September 29, 2022 @ 10:09:31 Mariah
February 15, 2019 @ 11:13:05 Mariah
November 16, 2018 @ 15:29:38 Mariah
October 15, 2018 @ 11:32:11 Mariah
January 26, 2017 @ 08:38:04 Mariah
January 26, 2017 @ 08:32:53 Mariah
April 18, 2016 @ 10:05:12 Mariah
April 18, 2016 @ 09:59:03 Mariah